guide

Caoimhe

Jailbreaking my 2012 Kindle Paperwhite

I usually prefer to read paper books and get them from my local library when I can, but I have an old Kindle Paperwhite that I generally load up with books to read while travelling. It saves a lot of hassle, bulk and weight compared to carrying around several paperbacks.

I had previously looked into custom Kindle firmware and found people saying that such things don’t exist, but with Amazon pulling support for old Kindles I had another look and realised that I’d missed something: There may not be fully custom firmware for Kindles, but there is jailbreaks and custom software. I took me a while to get it working, navigating various Mobile Read forum threads to piece together steps that worked and now that I have KOReader up and running (and can therefore finally read EPUB files on my Kindle) I decided to write up the exact, reproducible steps that I took to get there.

Getting device information

The first thing you need is the serial number of your Kindle to determine the exact model type and compare it to the Mobile Read wiki page on Kindle serial numbers. You can get this on Amazon’s website while logged into the account that the Kindle is registered to or from the device itself.

Confusingly, on my Kindle you must access this by Menu button, selecting Settings, then pressing the Menu button again (which pops up a different menu when pressed from inside the settings screen) and then selecting Device Info. The wiki page does mention this too, but I missed it at first. The device info popup also has the firmware version, which for me was 5.6.1.1, which will also be important.

In my case the serial number starts with B024. Amazon’s site describes it as “Kindle Paperwhite (5th Generation)” and the Mobile Read wiki calls it “Kindle PaperWhite WiFi”, but more importantly the nickname that is used in Mobile Read’s guides is PW (or PW1), which was needed for figuring out which jailbreak I needed.

Grabbing the software

The jailbreak method I used for my PW1 only works for firmware version 5.05.4.4.2, while mine was 5.6.1.1. The jailbreak can’t be installed in version 5.6, but if it was previously installed it can be patched to work again. This meant that I had to downgrade the firmware, install the jailbreak, upgrade the firmware again, and then apply the upgrade patch to fix the jailbreak. And then I also needed the software I want to actually run on the Kindle afterwards, which in my case was KOReader, a Stardict dictionary for KOReader, and Kindle Unified Application Launcher (KUAL) to allow me to launch the reader in the first place.

These can all be grabbed here:

Factory reset (do not actually do this)

To ensure that these steps worked from a blank slate I repeated them after doing a factory reset on my Kindle. As Amazon are ending support for older Kindles if you do a factory reset after the 20th of May 2026 you will not be able to re-register your old Kindle and it will be effectively bricked. I intend to keep mine on permanent aeroplane mode from now on to ensure Amazon don’t do anything else funny to mess it up.

If Amazon haven’t turned off the servers yet and you are logging into an old Kindle and you have two-factor authentication enabled then login will fail if you try to log in with just your username and password, but you can append your six-digit authentication token to the end of your password and it should work.

Installation

  1. Getting ready

    1. If Amazon haven’t already turned off the servers then now is the time to download any books that you want to keep from your Amazon account onto the Kindle.
    2. Once that’s done enable aeroplane mode by navigating to MenuSettingsAeroplane Mode.
  2. Downgrade the firmware to 5.4.4

    1. Connect the Kindle to your computer with a Micro-USB cable, it should mount the same as an external drive or memory stick. If it doesn’t and only starts charging try using different Micro-USB cables until you have one that does data transfer.
    2. Copy update_kindle_5.4.4.bin to the root directory of the Kindle.
    3. Without ejecting the Kindle or unplugging the USB cable hold down the power button of the Kindle until the charging light goes out and it unmounts from the PC. This took about twelve seconds for me.
    4. When you release the power button the Kindle should restart and begin installing the new firmware after a few seconds.
  3. Install the jailbreak

    1. Once the firmware downgrade is finished and Kindle has restarted check that the downgrade was successful by going to MenuSettingsMenuDevice Info and ensuring the firmware version is now 5.4.4.2.
    2. Reconnect the Kindle to your PC.
    3. Extract the contents of kindle-jailbreak-1.16.N-r19426.tar.xz and from that extract the contents of kindle-5.4-jailbreak.zip into the root directory of the Kindle.
    4. Eject the Kindle from your PC and unplug the USB cable.
    5. Install the jailbreak from your Kindle by navigating MenuSettingsMenuUpdate Your Kindle. If the option is greyed out make sure that aeroplane mode is on, reconnect your Kindle to your PC and double check that all the contents of kindle-5.4-jailbreak.zip (including Update_jb_$(cd mnt && cd us && sh jb.sh).bin) are still in the root directory of your Kindle (copy them over again if not) and try again.
    6. If the jailbreak was successful then some text saying JAILBREAK should appear at the bottom of the screen.
  4. Install KOReader and KUAL

    1. Reconnect the Kindle to your PC.
    2. Extract the contents of koreader-kindle-v####.##.zip to the root directory of the Kindle.
    3. Extract the contents of dict-en-en.zip to /koreader/data/dict/
    4. From KUAL-v2.7.37-gfcb45b5-20250419.tar.xz extract KUAL-KDK-2.0.azw2 and copy it to /documents/
  5. Upgrade back to 5.6.1.1

    1. Copy update_kindle_5.6.1.1.bin to the root directory of the Kindle.
    2. Eject the Kindle from your PC and unplug the USB cable.
    3. Navigate to MenuSettingsMenuUpdate Your Kindle and wait for the upgrade to install.
  6. Install the jailbreak hotfix

    1. Reconnect the Kindle to your PC.
    2. Copy Update_hotfix_universal.bin to the root directory of the Kindle.
    3. Eject the Kindle from your PC and unplug the USB cable.
    4. Navigate to MenuSettingsMenuUpdate Your Kindle one last time.

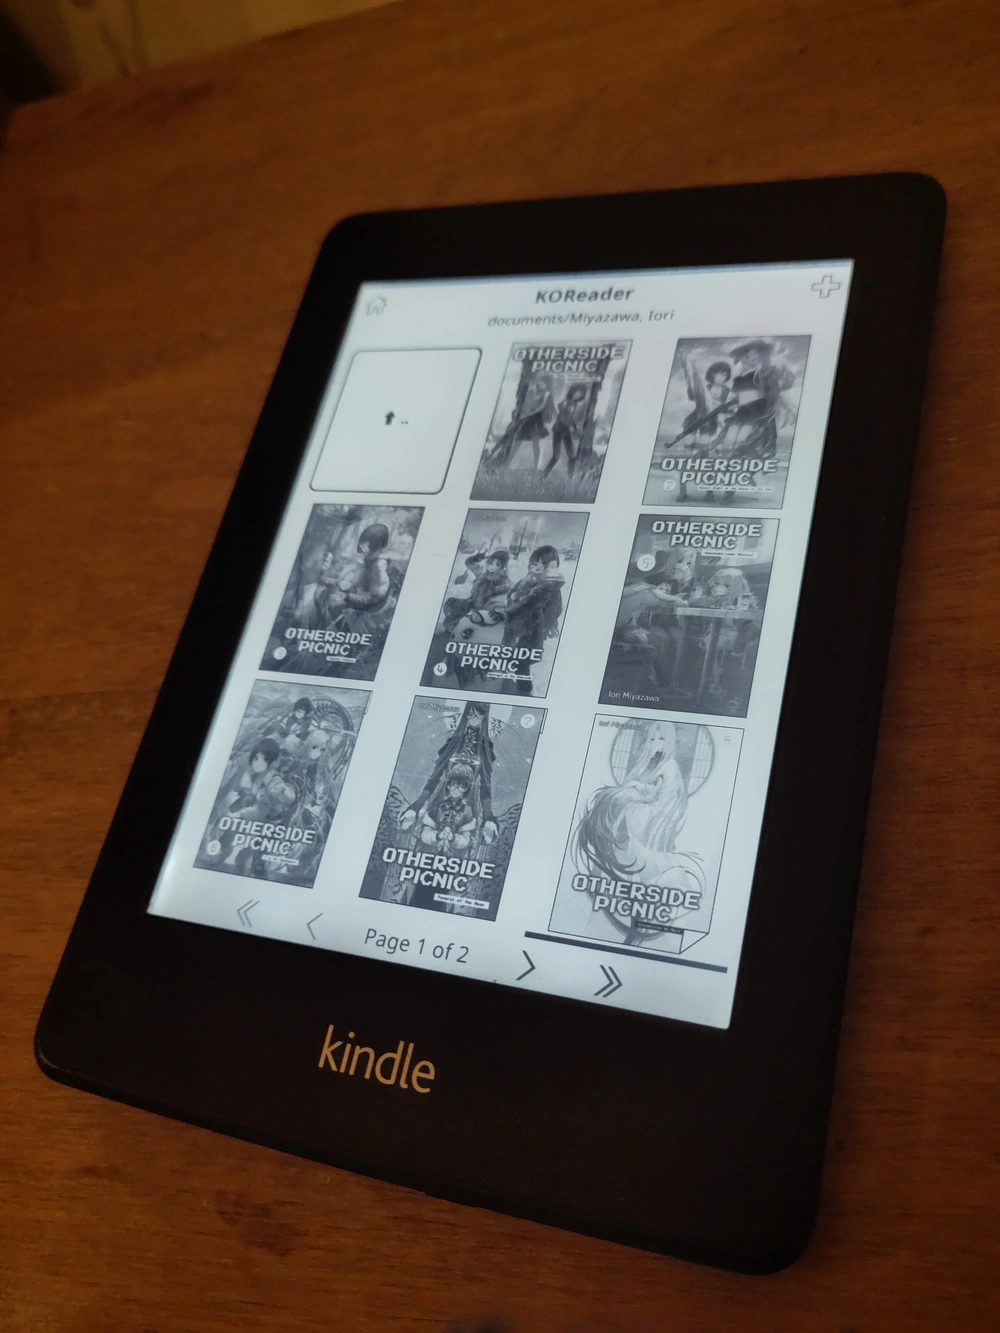
All going well there should now be a Kindle Launcher/KUAL entry on your Kindle homescreen amongst the books and when pressed should take you to a screen that will let you launch KOReader (or any other homebrew software that you install). KOReader itself should give you a file browser that you can use to read EPUBs, PDFs and other formats that your Kindle couldn’t natively. You can transfer books over just by copying them over with a USB cable the same way as any other file.

KO Reader, showing volumes of Otherside Picnic ready to read.
These are all EPUBs.

I use Calibre to organise my e-books and it can handle transferring them over to the Kindle too, though by default it only sends books in formats the Kindle can natively read. You can change what formats it will transfer over as well as the folder structure it uses from the settings for the Kindle plugin under PreferencesPlugins.


Caoimhe

Splicing in The Big O’s original intro with FFmpeg… again!

I have posted before about using FFmpeg to restore The Big O’s original intro and also my Jellyfin server. I am going to talk about the former again but first some more detail on the latter.

My Jellyfin server is actually just my desktop, which acts as server for everything on my home network. It has a 12TiB hard drive for storage which is divided up into a few partitions, one of which is my “library” partition of important files I want to keep, and which I make regular backups of, and one of which is my “media” partition that holds the files for my Jellyfin server. The media partition was running out of space (I may go a bit extreme with the bluray rips) and the library had several times more free space than used, so I decided to try to resize them and grow the media partition into some of the library partition’s empty space.

I just used KDE’s built-in partition manager for this, which successfully shrank the library partition but for some reason failed when trying to grow and move the media partition. I don’t know why this happened and am just hoping there’s no hardware problems. Nothing from the library partition was lost (and it was all backed up anyway) but the media partition was gone and so I’ve had to rebuild my Jellyfin library. This is not a huge deal it’s just been a little time-consuming but one of the things that was lost was, of course, my edited Big O episodes, which meant that I had to redo splicing the original intro in. But I had a fresh head again, free of the frustrations accumulated while trying to do this the first time, and I decided to do it better and actually get to grips with FFmpeg’s filter syntax. Here are the commands I ended up with:

mkdir -p tmp
mkdir -p out
for v in The\ Big\ O*.mkv
	set b (basename "$v" ".mkv")
	ffmpeg -i intro.webm -ss 00:01:12.02 -i "$v" -filter_complex "[0:v] scale=1424:1080,setsar=1:1 [intro]; [intro][0:a][0:a][1:v][1:a:0][1:a:1] concat=n=2:v=1:a=2 [outv][outa];" -shortest -map "[outv]" -map "[outa]" -metadata:s:a:0 language=eng -metadata:s:a:1 language=jpn "tmp/$v"

	set subs "$b.ass"
	ffmpeg -itsoffset -4.42 -i "$v" "tmp/$subs"
	ffmpeg -i "tmp/$v" -i "tmp/$subs" -shortest -map 0 -map 1 -c copy -metadata:s:s:0 language=eng "out/$v"
end

Let’s break down what’s happening here. First I create two directories, tmp and out. tmp is where temporary working files are going to be written to and out is for the final files when we’re finished processing.

Then loop over each episode matroška file with the file name for each one assigned to $v inside the loop. The file name without the file extension is set to the variable $b. I’m using a Fish shell here rather than Bash so the syntax is a little different to Bash.

Then the big command. We pass in the first input, intro.webm, which is the intro that I downloaded off of Youtube. Our second input is the episode, with the seek parameter -ss telling FFmpeg to skip to one and twelve point zero two seconds in when reading it. This is, unintuitively, set before you specify the input it applies to, not after.

Then the big -filter_complex. This takes a big string that takes filter definitions separated by semicolons. Each filter has input and output streams identified by labels in square brackets.

The first filter is [0:v] scale=1424:1080,setsar=1:1 [intro]. Its input is [0:v], the video stream from the first input1, i.e., intro.webm. It then resizes it to a resolution of 1,424×1080 pixels and sample aspect ratio of 1:1 and outputs it to a new stream labelled [intro]. The [intro] stream now has the same resolution as our episodes which will allow us to concatenate them in the next filter.

The second filter is [intro][0:a][0:a][1:v][1:a:0][1:a:1] concat=n=2:v=1:a=2 [outv][outa]. Let’s start in the middle here. concat=n=2:v=1:a=2 means that we are going to concatenate two segments (n=2) which each have one video stream (v=1) and two audio streams (a=2). Those two audio streams are going to be the English and Japanese dubs.

The inputs for this filter are [intro][0:a][0:a][1:v][1:a:0][1:a:1], which can be divided into our two segments—[intro][0:a][0:a] and [1:v][1:a:0][1:a:1]—which each have one video and two audio streams specified. The first segment has our resized intro video stream, [intro], and [a:0] is the audio from our first input (the intro again) specified twice because we are going to combine the same intro audio with both the English and Japanese episode audio. The second segment has the video and two audio streams from our second input file; the episode itself and its English and Japanese audio tracks.

The concatenation then has two output streams, [outv][outa], the video and audio.

Then the rest of the command: -shortest makes sure that the output of the command is equal to the shortest stream in the output, i.e. if your output has five minutes of video but only two minutes of audio then the output will be two minutes long rather than five minutes of video with three minutes of silence. I think that shouldn’t really be needed here but I was using it while testing and forgot to remove it and thought it would be dishonest to take it out for the post when it was what I actually ran.

-map "[outv]" -map "[outa]" defines what streams to include in the output, which here is simply the output streams of our concatination.

-metadata:s:a:0 language=eng -metadata:s:a:1 language=jpn labels the audio output streams as being English and Japanese, respectively, so that media players can display that information.

And then the last part of the command is ouputting the video to the tmp folder.

This gives us output files with the original intro with both dub tracks preserved, which is more than I had last time and with a lot less processing. But if I am going to include the Japanese audio I probably also want subtitles for that and unfortunately the -ss parameter does not seem to correctly offset the subtitles. If I want subtitles with correct timing I will have to fix them with another command.

First set a variable, $subs to the file name we want for the subtitles in the Advanced SubStation format.

Then read the original episode file into FFmpeg again with a negative offset of 4.42 seconds (-itsoffset -4.42) and write the subtitle data to a file in the tmp folder.

The last command is taking in out output video and the subtitle file and recombining them, using another metadata command to label the subtitle track as English, setting the codec mode (-c) to copy so that the audio and video do not get re-encoded and writing the finished file to the out folder.

I didn’t bother fixing the chapters this time.

  1. FFmpeg indexes from 0, so [0:v] refers to the video stream from the first input, [1:a:0] refers to the first audio stream from the second input, etc. 


Caoimhe

Splicing in The Big O’s original intro with FFmpeg

I have an updated version of these commands in a new bog post.

I have been rewatching The Big O with my partner from bluray rips and as nice as it is to watch it in so much higher quality than when I saw it as a kid but the bluray release lacks the original iconic intro, which is presumably related to the fact that it’s basically Flash by Queen over the visuals of the intro for Ultraseven.

I know enough FFmpeg to be a danger to myself so I decided to spend far too much time banging my head against my keyboard until I managed to splice the original intro into all the episodes. There was a good bit of trial and error and fixing things and adjusting commands but I decided to document a cleaned up version of the steps mostly as a reference material for myself if I decide to do something like this in the future but if it helps anyone else then that’s cool.

What I have below is definitely not the best way to do this. I ended up reprocessing the same videos multiple times which is inherently going to result in a loss in quality and I lost information like subtitles and the Japanese audio track by converting from Matroška files to plain MPEG-4s but I wasn’t using those anyway.

1. Prepare the intro

I used yt-dlp to download the intro from Youtube as it wasn’t included in the bluray files and then blew it up to the same resolution as the bluray rips, 1424×1080.

yt-dlp 'https://www.youtube.com/watch?v=s7_Od9CmTu0'
ffmpeg -i The\ Big\ O\ Opening⧸Intro\ Theme\ \[720p\]\ \[s7_Od9CmTu0\].webm -vf "scale=1424:1080,setsar=1:1" intro.mp4

2. Preparing files

I copied all the episodes that had the intro I wanted to replace into a folder. Episodes one and two of the first series and episodes one, eight and thirteen of the second series have special intros so no processing needed to be done on them. For step 4 it turned out that spaces in the filenames broke the command and I couldn’t figure out how to properly escape them so while preparing the files also remove any spaces or other characters that might cause problems from the filenames.

3. Strip the existing intro

I loaded episodes up in Kdenlive just to check the exact length of the existing intro on the episodes and found it to be 1′12″ and so wrote a command to iterate over all the files and write out an MP4 version with the English audio track (the second audio track in the file, but mapped as 1 in the command as FFmpeg indexes from 0) with that much time cut from the start.

I use a Fish shell rather than Bash. If you use Bash or a different shell you will need to adjust the commands.

for v in *.mkv
	set b (basename "$v" ".mkv")
	ffmpeg -i "$v" -ss 00:01:12.01 -map 0:v -map 0:a:1 "$b-nointro.mp4"
end

There were a couple of episodes where it turned out that there was still one frame of the old intro left at the start so those had to be reprocessed with the start time set to 00:01:12.02.

4. Splice in the original intro

I moved the downloaded intro file into the same folder as the episodes and spliced it into the files. This broke when there were spaces in the filenames and I wasn’t able to escape it properly so I ended up just stripping spaces out and renaming the files back with KRename afterwards.

for v in *-nointro.mp4
	set b (basename "$v" "-nointro.mp4")
	ffmpeg -i intro.mp4 -i "$v" -filter_complex "movie=intro.mp4, scale=1424:1080 [v1] ; amovie=intro.mp4 [a1] ; movie=$v, scale=1424:1080 [v2] ; amovie=$v [a2] ; [v1] [v2] concat [outv] ; [a1] [a2] concat=v=0:a=1 [outa]" -map "[outv]" -map "[outa]" "$b-intro.mp4"
end

5. Fixing chapter metadata

The episodes had some chapter metadata dividing up parts of the episode, with the first one covering just the episode intros, which cutting out that part of the video removed. I decided to fix that with the versions with the restored intro, even though obviously I am never actually going to skip it in practise. The first step of this was outputting the metadata to a text file.

for v in *-intro.mp4
	set b (basename "$v" "-intro.mp4")
	ffmpeg -i "$v" -f ffmetadata "$b.txt"
end

I then manually adjusted the metadata entry to restore the Chapter 01 entry, putting it above the existing chapters in the file. Most of them had their Chapter 01 entry wiped out so I just added it in above the Chapter 02 entry, though some of them still had a Chapter 01 lasting just a few milliseconds so for those I just modified the END time for it. The new intro was 1′7.61″ which meant a 67,610ms timestamp. I also changed the START entry for every Chapter 02 to 67610 to match.

[CHAPTER]
TIMEBASE=1/1000
START=0
END=67610
title=Chapter 01

Once they were all updated I applied the modified chapter metadata back to the files

for v in *-intro.mp4
	set b (basename "$v" "-intro.mp4")
	ffmpeg -i "$v" -i "$b.txt" -map_chapters 1 -codec copy "$b.mp4"
end

6. Done!

Then I deleted all the intermediary files and dropped the processed files into my Jellyfin server along with the episodes that didn’t need fixing.


Caoimhe

Migrating comments from Cusdis to Comentario

The story so far: I was using Cusdis to provide a comments section for the bog but it proved to be broken and unmaintained so I replaced it with a self-hosted instance of Comentario.

I am going to walk through what I did to set up Comentario and import old comments from Cusdis. This is not a guide and the scripts that are posted below have serious problems that should be fixed before being used and I am not going to be the one to do that and you would obviously need to change any references to oakreef.ie to your own site.

Subdomain

First of all I needed to have an address to host the Comentario instance at. I chose a new subdomain at comments.oakreef.ie and had to update my Let’s Encrypt certificates to cover that new subdomain. I did not save the commands I used to do that but it was pretty straightforward to do from the command line.

Docker

Then I installed Docker on my server and following Damien’s example with a few tweaks I created my docker-compose.yml and secrets.yaml files.

docker-compose.yml

version: '3'

services:
  db:
    image: postgres:17-alpine
    environment:
      POSTGRES_DB: comentario
      POSTGRES_USER: {INSERT POSTGRES USERNAME HERE}
      POSTGRES_PASSWORD: {INSERT POSTGRES PASSWORD HERE}
    ports:
      - "127.0.0.1:5432:5432"

  app:
    restart: unless-stopped
    image: registry.gitlab.com/comentario/comentario
    environment:
      BASE_URL: https://comments.oakreef.ie/
      SECRETS_FILE: "/secrets.yaml"
    ports:
      - "5050:80"
    volumes:
      - ./secrets.yaml:/secrets.yaml:ro

secrets.yaml

postgres:
  host:     db
  port:     5432
  database: comentario
  username: {INSERT POSTGRES USERNAME HERE}
  password: {INSERT POSTGRES PASSWORD HERE}

Changing the ports configuration to 127.0.0.1:5432:5432 means that the Postgres database is only accessible from the server locally and not publicly available. I also don’t have an email setup for the Comentario instance currently.

Launching the instance is then just a matter of:

sudo docker compose -f docker-compose.yml up -d

Nginx

Then I needed to modify my Nginx config to direct comments.oakreef.ie to the Comentario instance running on port 5050.

server {
	server_name comments.oakreef.ie;

	listen 443 ssl;

	ssl_certificate     /etc/letsencrypt/live/oakreef.ie/fullchain.pem;
	ssl_certificate_key /etc/letsencrypt/live/oakreef.ie/privkey.pem;
	include /etc/letsencrypt/options-ssl-nginx.conf;
	ssl_dhparam /etc/letsencrypt/ssl-dhparams.pem;

	location / {
		proxy_pass http://127.0.0.1:5050;
		proxy_redirect off;
		proxy_http_version 1.1;
		proxy_cache_bypass $http_upgrade;
		proxy_set_header Upgrade $http_upgrade;
		proxy_set_header Connection keep-alive;
		proxy_set_header Host $host;
		proxy_set_header X-Real-IP $remote_addr;
		proxy_set_header X-Forwarded-For $proxy_add_x_forwarded_for;
		proxy_set_header X-Forwarded-Proto $scheme;
		proxy_set_header X-Forwarded-Host $server_name;
		proxy_buffer_size 128k;
		proxy_buffers 4 256k;
		proxy_busy_buffers_size 256k;
		add_header Cache-Control "private";
	}
}

Importing comments

Once there were a few comments on the new system I used the export feature in Comentario to get a JSON file and looked at how Comentario defined comment data in that. I also manually went through all the comments on the old system and made a basic CSV file of all of them with the author name, date posted, the URL of the post the comment was on and the text of each comment. I then wrote this Python file to take the exported Comentario comments—named basedata.json—and the CSV with the old Cusdis comments—comments.csv—and exported a new file with the combined data in the Comentario format.

There are some problems with this!

  1. When importing data Comentario does not check for duplicates. I ended up creating duplicates of all the new Comentario comments that already existed on the site doing this and had to manually delete them. If you are doing this do not include existing comments as part of the file you are creating to import.
  2. I did not include replies at all. I decided to try importing replies I had made to people as a second, separate, step (see the second Python script below). This made things more awkward down the line. Do everything in one batch.
import csv
import json
from datetime import datetime, timezone
from dateutil.parser import parse
from pprint import pprint
from uuid import uuid4

now = datetime.now()
pages = {}
site_url = 'https://oakreef.ie'
date_format = "%Y-%m-%dT%H:%M:%SZ"

my_id = "ADMIN USER UUID"

with open('comments.csv', newline='') as csv_file:
		csv_reader = csv.reader(csv_file, delimiter=',', quotechar='"')
		for row in csv_reader:
				author, date, url, text = row
				date = parse(date)
				
				if url not in pages:
					pages[url] = {
						'comments': []
					}
				
				pages[url]['comments'].append({
					'author': author,
					'date': date,
					'text': text
				})


with open('basedata.json') as json_file:
		data = json.load(json_file)

domainId = data['pages'][0]['domainId']

for url, page in pages.items():
	page_id = str(uuid4())
	data['pages'].append({
		'createdTime': now.strftime(date_format),
		'domainId': domainId,
		'id': page_id,
		'isReadonly': False,
		'path': url,
	})

	for comment in page['comments']:
		comment_id = str(uuid4())
		data['comments'].append({
			"authorCountry": "IE",
			'authorName': comment['author'],
			'createdTime': comment['date'].strftime(date_format),
			"deletedTime": "0001-01-01T00:00:00.000Z",
      "editedTime": "0001-01-01T00:00:00.000Z",
      "html": f"\u003cp\u003e{comment['text']}\u003c/p\u003e\n",
			'id': comment_id,
			'isApproved': True,
			'isDeleted': False,
			'isPending': False,
			'isSticky': False,
			'markdown': comment['text'],
			"moderatedTime": comment['date'].strftime(date_format),
			'pageId': page_id,
			'score': 0,
			'url': f'{site_url}{url}#comentario-{comment_id}',
			'userCreated': '00000000-0000-0000-0000-000000000000',
			"userModerated": my_id
		})


with open('import.json', 'w') as import_file:
	json.dump(data, import_file)

When that was done I put it away for a while as I wasn’t feeling well and eventually came back to do replies. I, again, manually went through all replies I had made to comments on the old system and made a CSV file with the reply date, URL of the page, the UUID of the parent comment as it existed in the new Comentario system, the UUID of the page the parent comment is on in teh new Comentario system and the text of the reply.

Two things are important to note about this:

  1. It was a pain in the hole. If I had done replies at the same time as the rest of the comments I could have used the UUIDs that I was generating in the script rather than going to find them manually and making them into a CSV.
  2. The initial upload failed as apparently Comentario couldn’t match the page and user IDs to what was in the database and it needed those to be in the import file. I got around this by doing another export and copying the entries for pages and commenters from that into the new one and uploading. This was not a good way to do this! It could have gone badly or had unexpected side effects. Again, if you’re doing this do not import comments and replies as two separate steps!
  3. It still didn’t fully work anyway. My replies did import and do show up on the right pages but they are not nested properly as replies. It’s like looking at a comment section on a very old Youtube video where reply chains are broken and everything just displays as individual comments. I don’t think that I am going to bother trying to fix this as I don’t have that many comments on this site and I think everything reads understandably as it is but if you want to try this approach you will want to figure out a way of not fucking up importing the replies.
import csv
import json
from datetime import datetime, timezone
from dateutil.parser import parse
from pprint import pprint
from uuid import uuid4


now = datetime.now()
site_url = 'https://oakreef.ie'
date_format = "%Y-%m-%dT%H:%M:%SZ"

my_id = "ADMIN USER UUID"

data = {
  "version": 3,
  "comments": [],
}

with open('replies.csv', newline='') as csv_file:
		csv_reader = csv.reader(csv_file, delimiter=',', quotechar='"')
		for row in csv_reader:
				date, url, parent_id, page_id, text = row
				date = parse(date)

				comment_id = str(uuid4())

				data['comments'].append({
					"authorCountry": "IE",
					"createdTime": date.strftime(date_format),
					"deletedTime": "0001-01-01T00:00:00.000Z",
					"editedTime": "0001-01-01T00:00:00.000Z",
					"html": f"\u003cp\u003e{text}\u003c/p\u003e\n",
					"id": comment_id,
					"isApproved": True,
					"isDeleted": False,
					"isPending": False,
					"isSticky": False,
					"markdown": text,
					"moderatedTime": date.strftime(date_format),
					"pageId": page_id,
					"parentId": parent_id,
					"score": 0,
					"url": f'{site_url}{url}#comentario-{comment_id}',
					"userCreated": my_id,
					"userModerated": my_id
				})


with open('reply-import.json', 'w') as import_file:
	json.dump(data, import_file)

My avatar

One last thing is that Comentario doesn’t allow GIF avatars, but I like my sparkly Jupiter. After looking at the Postgres database I could see that user avatars are simply stored as binary data in the table cm_user_avatars with three sizes avatar_l, avatar_m and avatar_s corresponding to 128×128, 32×32 and 16×16 pixels, respectively, so I made some GIFs in the appropriate sizes, converted them to binary strings, and overrode the avatar_l and avatar_m entries in the cm_user_avatars table manually (I left the avatar_s as a JPEG).

UPDATE cm_user_avatars SET avatar_m = '\xBINARY_DATA_HERE'  WHERE user_id = 'UUID_HERE';

This seems to work without any problems and my avatar in my own comments section is sparkly now.

Conclusions

That’s it I hope I don’t have to worry too much about this setup again for some time.